Food Photography Tips for Smart Phones
Food photography has changed more in the last 10 years than in any other time in history. This rapid change is a result of something most of us own: a smartphone. The March 2017 issue of Bon Appetit magazine was shot using smartphones. In April 2017, Bon Appetit announced that their April cover image was shot with an iPhone 7. Are you thinking, “Wait…how is this even possible?” You are not alone. Although smartphone cameras have come a long way over the years, there are still limitations as to what they can do.
We are all competing for attention in the Instagram feeds of our followers. The goal is interaction in the form of likes and comments. One way to reach this goal is to take great images with your smartphone. Having a fantastic image that promotes your brand or helps tell your story is worth the time and effort to learn how to take better photographs. We’ve compiled some quick tips that will take your smartphone photography game to the next level.
Food Photography Tips for Smart Phones
1. Lighting is VITAL. Avoid the flash, which can cast shadows, change colors and cause glare. Natural daylight is best. If you can’t go outside to a shady spot, find a window or use an LED vanity light or the flashlight on another smartphone to light your subject.
In our example to the right, By simply moving a gorgeous plate of food near a window at a restaurant, your photos will instantly become so much better. Natural light is fantastic! This photo was taken at Saint Jacques French Cuisine in Raleigh, NC.

2. The rule of thirds is key. Divide the frame into 3 pieces (horizontal, vertical, diagonal, light vs. dark, or subject vs. no subject). This can be applied to square, portrait or landscape framed images. Example: fill 2/3 of the frame with the subject and 1/3 background or vice versa.
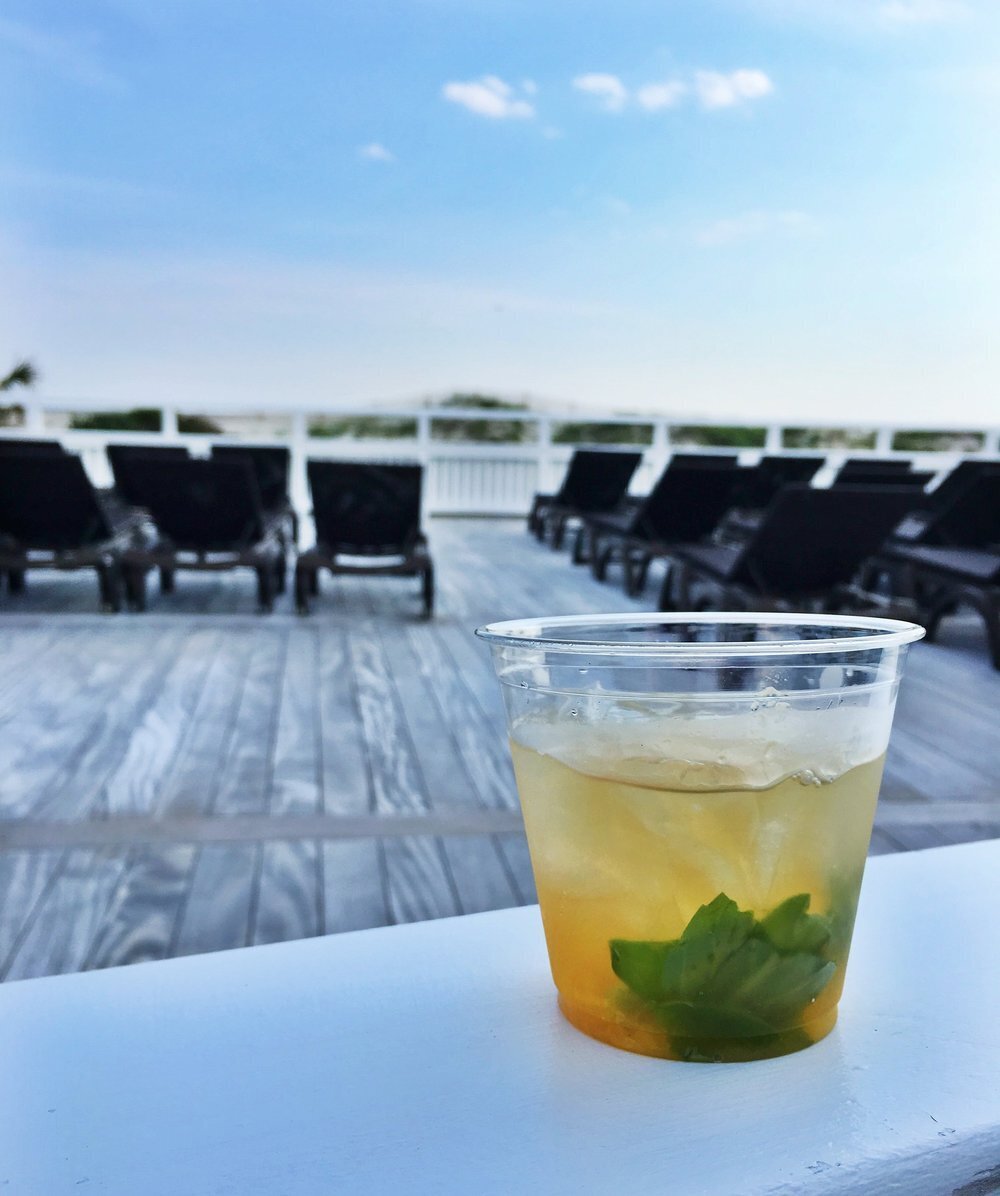
The image to the left was taken in Bald Head of a cocktail using the water and sand dunes as a background. The rule of thirds applies here because the lighter areas of the photograph vs. the darker areas of the photograph shows a 1/3 to 2/3 ratio.

3. Set the mood to evoke emotion. Some simple styling using utensils, textiles, table decor or background can create a scene or elicit an emotion. You want potential customers to see themselves eating that burger or enjoying that glass of wine.
The photo to the right is such a fun example taken at Biscuit Head in Asheville, NC. The angle of this photo really allows you to see just how giant the biscuit is, and the background of the tables and coffee mugs portrays the perfect brunch scene. Doesn't this shot make you crave a biscuit with an egg on top?

4. Post-editing apps are essential. Find the app that works best for you. Get to know it so that it will become a quick process. Post-editing helps to correct exposure, adjust white balance, give the subject clarity/sharpness and saturate colors for the WOW factor.
The photo to the left is a great example of using a post-editing app to enhance the colors and give the subject sharpness.
Finally, the most important tip—get out there and start capturing photos with your phone. The more you do it, the better your photos will be!
Blog post written by Tabletop Media Group's photographer, Stacey Sprenz. All photographs by Stacey Sprenz as well.